Hi guys
Just removed the main Gigabyte GA -B75M-D2V socket 1155 intel to clean, the seat guides you how to remove and assemble the cpu fan. It may look very simple, but many people put it together or break their legs. I received 10 repair machines, 8 of them removed the cpu fan and reinstalled it, all of them broke their legs or did not match the cpu. So this post is just for those who don’t know.
Fan (fan) intel CPU now most of the round fan, and the most popular today is socket 775 cpu fan, socket 1155 fan, socket 1156 fan, 1150 cpu fan, so the disassembly of this fan is a lot. If installed incorrectly, the fan’s leg will be broken.
Diseases related to the cpu fan such as the machine running for a moment off, caused by the cpu’s poor cooling fan, no thermal paste or because the fan has not been in contact with the cpu. In addition, if improperly mounted, the machine will not turn on or the machine will flicker. This is common in the mainboard socket 775 of Asus and ECS, due to the channel when plugged in.
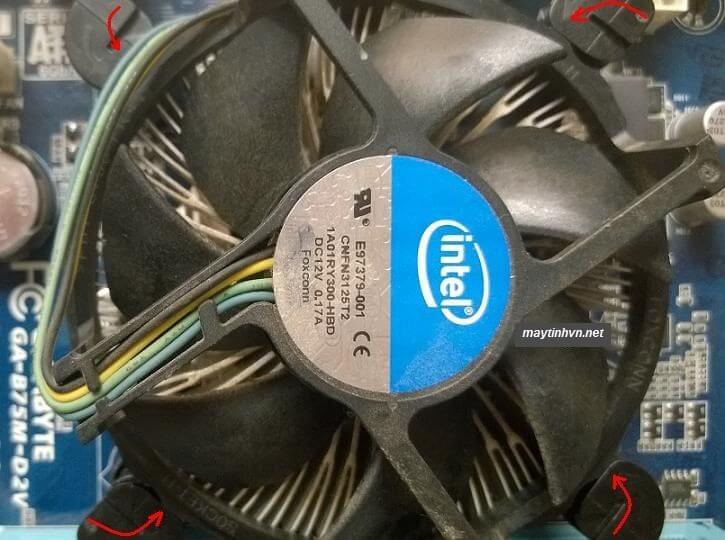
+ How to remove the cpu heatsink: First you proceed to rotate the fan’s 4 pins in the counterclockwise direction to remove, or in the direction of the arrow printed on the fan.
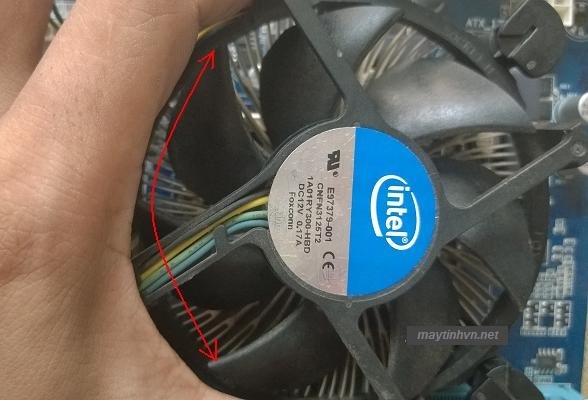
After turning all 4 cpu fan legs as shown above, you pull those 4 pins up and then hold the fan assembly and pull it up to take it out. After taking it out, continue to clean the fan, oil or spray RP7 to make the fan spin faster.
+ Attaching the fan to the mainboard: Mounting the fan seems more complicated because it does not match the 4 holes on the mainboard, forgetting to rotate the pin to break the leg or the fan does not contact the Cpu. Please proceed with the following steps.
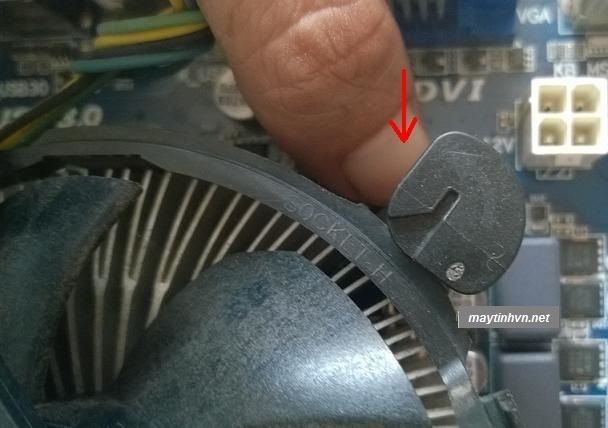
_Step 1: You proceed to rotate the 4 legs of the cpu heatsink in the same clockwise direction as at first on the mainboard, remember to rotate all 4 legs.
_Step 2: Attach the heatsink to the mainboard, put all 4 pins into the socket on the cpu and use the handle to rotate the fan up and down, rotate horizontally and vertically. The purpose is to know if the 4 pins have been plugged into the hole, if not in the hole enough it will be deflected, this is the most important, because 1 leg has not been in, you try to press down, it will break the fan leg right away, and do bad fan contact.
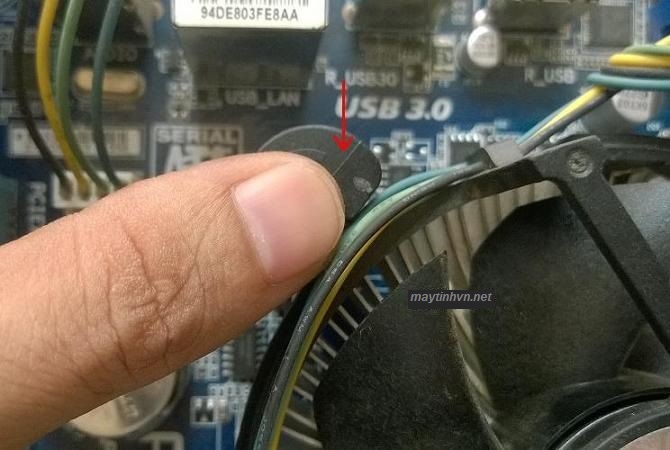 Gắn FAN_Step 4: Use your fingers to press on the 4 pins to plug the fan in to lock it, then you attach the fan wire to the CPU fan jack on the mainboard. Usually on the mainboard there are 2 jacks to plug in the fan, which is the cpu fan and the sys fan (CHA_FAN, PWR_FAN), you need to install it to the correct CPU FAN position, because the Asus mainboard if attached to another port will report a Fan error right away.
So it looks very easy to finish, right, good luck.


