Computer mainboard repair work often takes a lot of time without good support tools. So the mainboard test card is an indispensable tool for repairing the mainboard of a PC or Laptop. Guide you to diagnose motherboard disease by test card.
The mainboard test card has many types and costs from 100 – 800k depending on the function of the card and higher accuracy. The mainboard test card is mostly used via PCI interface. Currently, there are tet cards for mainboards using H61 chipset via PCI e 1X interface and costing about 800K can be used for both Laptop and PC. In addition, if you do not have the conditions to buy and test Laptop, please refer to the article: How to customize the laptop mainboard test card.
1. Mainboard test card shape
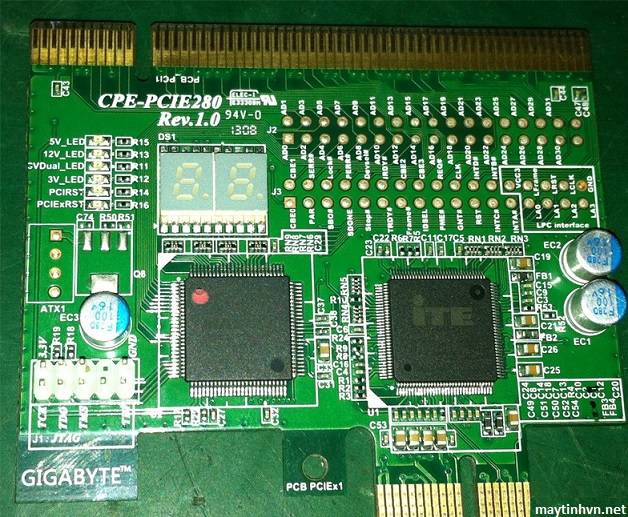
- Slots via PCI and PCIE1x interfaces.
Led indicator light 3v, 5v, 12v.
Led RST: This light will light up and then turn off to signal a reset pulse. This pulse is very important, if this light does not light or stays on all the time due to the voltage loss of the RAM circuit, CPU, chipset… Error IC clock, SIO, male chip.
LED indicator CLK: Indicates the clock has worked well.
The 7-segment Led (2 or 4) to report the POST code: This is the most important Led based on which we can diagnose what is wrong with the mainboard.
Some older test cards may not have or have some other indicator lights such as: IRDY, Frame, Run.The mainboard test card is not consistent between BIOS manufacturers (AMI, Award) so it will LED on some mainboards and incorrect on some other mainboards.
2. Function of mainboard test card
As mentioned above, the test card is used to check the mainboard through the code on the LED and based on the code document of each BIOS company. For example, you receive a mainboard that does not turn up, if you do not have a test card, you must measure whether the voltage sources are enough or not? If the voltage is enough but not running, you must review the CPU, BIOS, Chipset. If you use the mainboard test card, there is a system reset signal on the card -> OK power. You just need to load BIOS, Check CPU. Repair time will be faster and more accurate.
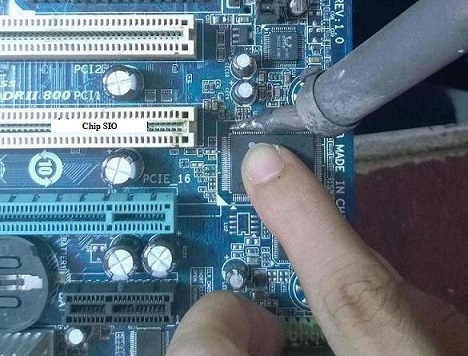
3. How to use test the H61 mainboard.
First, unplug all signal and power cables from all devices. Only leave the correct mainboard + CPU + RAM + Card test main.
Turn on the power and observe the functional LEDs on the mainboard test card to diagnose the disease.
Most of the 3.3v, 5v, 12v power LEDs will be fully lit, if these lights are missing, you need to check the contact pins of the card and the PCI slot on the mainboard.
CLK indicator (indicating whether there is a clock pulse or not): Usually this is rarely used because the card often cannot check the clock. To measure the clock pulse, you need to use a good VOM meter, or use a frequency meter. If the card is good, the clock light must be on to indicate a pulse, if the light is not on, the CLK pulse will be lost.
RST indicator: When we turn on the power, the RST light will light up and then turn off and reset again and again. If it doesn’t light up or it doesn’t turn off all the time, it’s a loss of reset pulse -> need to check the source again, the bridge chip is south.
After observing the functional LEDs, monitor the 7-segment LEDs.
If the led light says ” no-C ” ” 0000 ‘ ” – – ” : This is the most difficult disease to fix because it has many causes: BIOS error, CPU socket open, South or North Chipset error, IO error, power IC error If you encounter this disease, you need to use the elimination method from easy to difficult.
The test card immediately reports the code FF or C0: It is the same as on many errors: chip South, North, CPU, BiOS…After looking at the code on the functional led, you rely on that code and look up the code table (when buying, the book will look up the code table) to see what your mainboard is suffering from. This will take a while to remember.
* Common errors
If the card jumps to code C0, C1 or D0, D1… These errors are usually caused by the motherboard and CPU not running, but can be caused by unstable CPU supply Vcore, loss of RAM BUS or main CPU not supporting CPU.
If the test card jumps the code around (turn off the computer, then jump another code), it’s mostly because of the BIOS error, just reload the BIOS. There are also cases where the code jumps randomly, but it’s not a BIOS error, but due to the nature of the fake test card, the report is incorrect.
If the test card is reused at code 26, then you should make money to buy another test card. This error is due to the nature of the faulty test card. Common when we check on Gigabyte and Intel mainboards.
Led 7 segment code code C5, D6, 05 depending on the type of motherboard using BIOS of any company. This code is mostly due to a BIOS error, you have to reload the BIOS.
The test card runs to code 7F, then the mainboard has started up shows up. Because the BIOS setting is wrong, it stops asking to press the F1 key to continue or F2 to enter the BIOS settings. When we press F1 to continue, the test card will jump to FF and then the mainobard is up to normal. In addition, when this code is reached, the numlock light is on but not on, you need to check the discrete VGA card, onboard, monitor cable, LCD screen.
When we turn on the power, if the speaker mounted on the maiboard continues to “beep”, most of the mainboard and CPU are active. If not, then you need to check VGA, video card.
When we power on the mainboard and see the main test card one by one jumps the codes from Co, C1… D0, D1… EA… 7F and then FF, then the mainboard is already running completely. If it doesn’t show up, you have to check the screen, the video card.
The mainboard test card jumps code C0, C1.. and then stops C5, C6 or D5, D6, EA, most of it is Ram error, need to clean RAM slot, RAM pins (must make sure RAM is still in good use). If not, you need to check the RAM BUS source, steam or replace the Northbridge chip.
Above are instructions on how to use the mainboard test card and some common errors. Good luck to you guys, if you have any questions, just leave a comment below the article.


Đang đặt quảng cáo trống hả bác 😀
Có lẽ 🙂
khong like thì đừng nói lời cay độc !
Cho mình hỏi mã lỗi Card test pt902c cũng v ak bn
hello, nice