Hi guys
Perhaps people will find it strange when I give instructions on how to refill printer ink. When you learn about computers, computer technicians at vocational schools or centers often do not teach how to refill printer ink. But when you finish studying and apply for a job as a technician at computer service companies, people are required to know how to pump ink.
Printers include inkjet and laser printers. Laser printers are available in color and colorless (black ink) and this type is most commonly used. In black and white laser printing with HP’s printing technology, Canon uses the same ink-absorbing technology to print (so the ink has magnetism and magnetism) As for Brother and Lexmark, electrostatic discharge is used (in the ink cartridges, there is no electrostatic discharge). magnetism). Usually these machines are black when refilling ink, must replace the chip on the ink cartridge to be used. As for HP, Canon, it is simpler to replace, less need to change chips and it is also popular.
With ink bottles 12A, 15A, 35A, 36A, 49A, 85A, the removal of the tank is almost the same, if you look closely, it can be removed very simply. Only the 12A ink tank is a bit difficult to remove because it has 2 retaining pins. And on the cartridge there are also the same components.
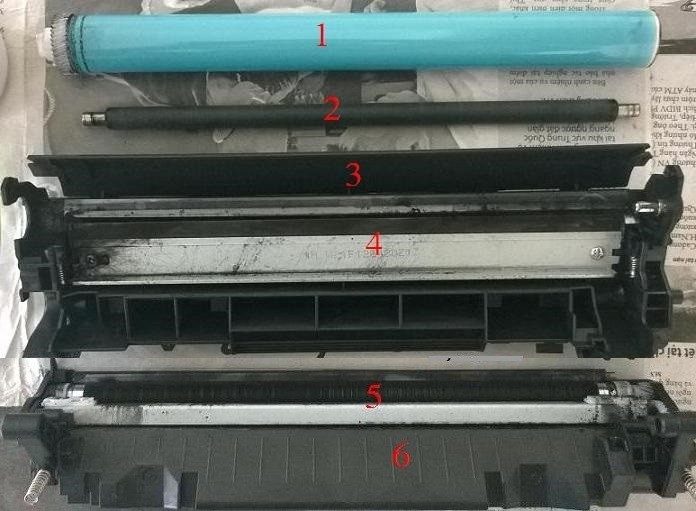
The components on the toner cartridge include:
Drum: Text and images are printed here first and then on paper, so it determines the sharpness of the print.
Rubber shaft or high-voltage shaft : To allow power to enter, press the paper against the drum.
Excess ink cartridge.
Wipe excess ink on the drum (large wiper): Wipe waste ink, excess ink on the drum to the excess ink container.
The magnetic shaft is used to suck up the ink and shoot it into the print, there is also a small lever nearby to remove excess ink on the magnetic shaft.
Ink cartridge for printing.
The picture above is the 85A toner cartridge on the HP laser jet p1102 printer, this box is removed the same as the 35a, 36a cartridges
+ How to remove: Proceed to remove the screws on both sides of the ink cartridge and then separate 2 parts: 1 side of the ink cartridge + magnetic shaft, 1 side 1 contains excess ink + drum + rubber shaft. When you remove it, you should pay attention to put it on the paper. Avoid scratching the drum, scratching the print with dots and stripes.
+ How to pump the printer ink: After removing the parts, proceed to replace the ink for the printer.
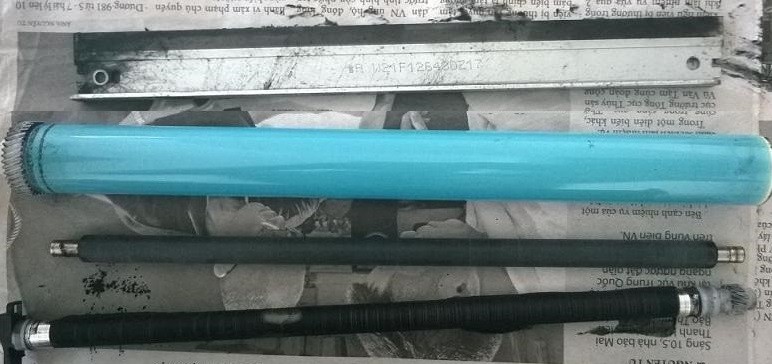
This is a picture of the ink tank after removing the front magnet. Usually some ink bottles have a side cover, you just need to open the lid and pour ink in, but this bottle does not have a lid, so you have to remove the magnetic shaft completely. If it’s the first time you pumped that printer ink (don’t know what kind of ink they used before), you should empty the remaining ink in the box, use toilet paper to swipe all the ink on the magnetic shaft, turn it small (for the ink is no longer available, because the ink mixes together making the print not good).
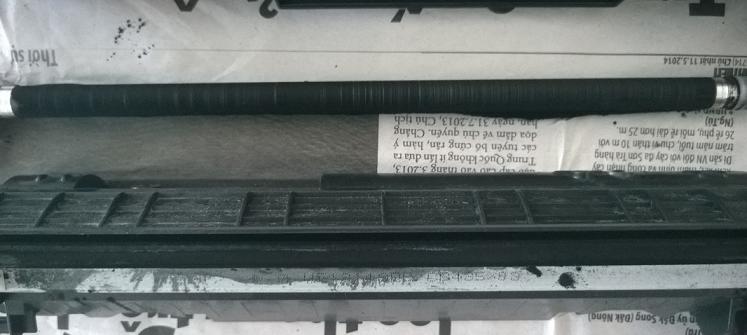
After pouring out all the ink, clean the magnetic shaft, turn it small, then proceed to pour new ink in. Before pouring ink, it is necessary to shake a few times to evenly distribute the ink. Be careful not to expose the ink to sunlight, it will damage the ink. Fill the ink tank about 140g to be full, then remove the magnetic wiper, use your finger to rotate slightly in the gear of the magnetic shaft to see if the ink is even, if there is too much ink, use a brush to sweep it there. Continue to rotate, if it is still there, change the small lever. The wiper is small due to long-term use, it loses its elasticity, so it can’t wipe the ink. After checking, clean the ink cartridge and set it aside.
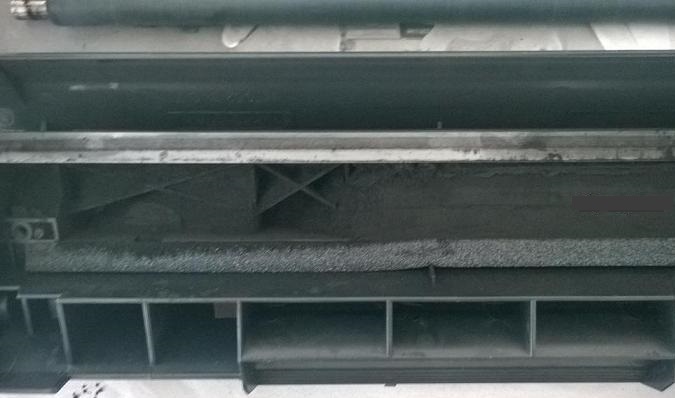
Next, pour the excess ink in the excess ink container by unscrewing the 2 screws on both sides of the large wiper, emptying out all the ink, cleaning it, and then attaching the large wiper.
Use toilet paper to wipe the rubber shaft (high-pressure shaft) and attach it to the assembly containing excess ink, be careful not to stick fingerprints, there will be fingerprints on the paper. Clean the drum (drum) and then attach it to the assembly containing the excess ink. After this cluster is assembled, you use your fingers to dip into the ink and then swipe along a long line on the surface of the drum, then rotate the drum surface a few times to see if there is still ink on the drum. If the ink is still on the drum, the large wiper must be replaced, it loses its elasticity so it cannot remove the excess ink. Do not change the print will be black.
+ How to assemble the ink cartridge: The toner cartridge consists of 2 clusters: 1 cluster (containing ink + small wiper + magnetic shaft) and 1 cluster (excess ink + large wiper + rubber shaft + drum) After cleaning, proceed to proceed. Assemble it and use your thumb to rotate the drum a few times to clean the side of the drum, then attach it to the printer and do a test print.
Conclusion: It’s a bit long, at the time I wrote the article, there was no assistant to shoot, so I couldn’t make a video. You should do exactly as instructed, then there will be no black errors on the paper, stripes… Loading ink is important where you clean the components, the contact places, the ink cartridge with the printer, and avoid the field. In case of lack of mass, the print will be pure white. And if any component is damaged, replace it, most of the time the drum is damaged, the worn out drum will make the print blurry. Hope this tutorial on how to refill laser printer ink will help you.


